The Inspiring of WoodCraft

Specialty Saws

Hacksaw
hacksaw
A hacksaw in a woodshop? You bet. I often incorporate metal parts in many of the jigs, fixtures, and projects I build. And Murphy's Law says the carriage bolt or threaded knob I want to use will be too long. A hacksaw, with its fine teeth and hardened steel blade, will make short work of cutting through bolts, screws, even hinges. Choose blades with fine teeth for cutting through thin, hard metals and coarser teeth for softer materials like alu­minum, which tend to clog the finer teeth.
Miter saw
miter saw
For the most part, miter saws like the one shown in the middle photo have been replaced in the woodworking shop by the power miter saw. Miter saws are, naturally, designed to fit in a miter box; they're basically long back saws with crosscut teeth. If the blade is well sharpened and there's no play in the guides, this type of setup works well. Unfortunately, there's usually a problem with either the saw or the guides and so these can be used only for rough work.
Compass saw
compass saw
The compass saw, or keyhole saw has also generally been replaced by its electric cousins, the saber saw and jigsaw. Since this type of saw has no frame and a thin tapered blade, it can be used to make cuts where other saws can't. On the downside, with no frame and a thin, tapered blade, this saw is highly prone to bending and kinking in use. The only way to prevent this is to make light, non-rigorous cuts.

Japanese Saws

japanese saws
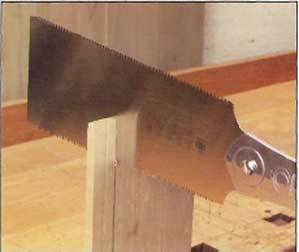
If you haven't already tried one, Japanese saws are another one of those must try tools. Unlike Western saws, which cut on the push stroke, Japanese saws cut on the pull. Many woodworkers (including myself) feel that this affords better control. Also, because the blade is pulled through the cut, there's less chance of crimping the blade. This means the blades can be thinner, which results in a thinner kerf. The metal used for Japanese saws is harder and the teeth are tempered to a high degree. This keeps them sharper longer, but makes them almost impossible to resharpen. This isn't a negative, since the tooth geometry is complex (see Bird's Mouth on Coping And Fret Saws), and with many of these you can replace the blade when it dulls).
Dozuki
japanese saws, dozuki
Of all the Japanese saws, the dozuki (pronounced DOZE-oo-key) is my favorite. It's the Japanese equivalent of the Western back saw; and since I began cutting dovetails with one of these many years ago, it has earned a special place in my tool chest. Dozuki means "shoulder" in Japanese, and this saw was originally intended to cut the shoulders of a tenon. But I've found that this thin but rigid backed blade is perfect for almost any handcut joinery. Typically this saw has around 26 teeth per inch and can vary from 8" to 12" in length.
Ryoba
japanese saws, ryoba
The ryoba saw (pronounced Ree-OH-bah) is a terrific saw to have on hand, as it combines the functions of a Western crosscut and rip saw in one tool. Ryoba means "double" in Japanese, and this saw has cross teeth on one side of the blade and rip teeth on the other. These saws come in blade lengths varying from 7" to 13". The smaller saw works well for joinery and the larger versions are excellent for general purpose cutting.
Azebiki
japanese saws, azebiki
The azebiki saw (pronounced Eh-zeh-BEE-kee) is a special type of ryoba saw (crosscut teeth on one side, rip teeth on the other) that is designed specifically to make plunge cuts, such as a mortise or tenon in the center of a board. The blade is curved to let you easily start a cut in the middle of a work piece. Its diminutive size makes it handy for getting into places other saws can't. The curved blade also makes it easy for you to clear sawdust from the kerf by simply using a rocking motion as you cut.
Kugihiki
japanese saws, kugihiki
The kugihiki saw (pronounced COO-gee-HEE-kee) is another specialty saw that you might find useful. In Japanese, kugi­hiki means "to cut nails," as in wooden nails or dowels. The super thin blade does not have a back like the dozuki, so it's extremely flexible, but also prone to kinking. And just as important, the teeth on this style saw have no set. This means that the blade can rest on a surface without scratching it. The downside to this is that binding can occur if you're removing a lot of wood, such as when cutting off a through tenon.
TOOTH PROFILES
Japanese saws, tooth profiles
If you examined the teeth of a Japanese saw with a magnifying lens, you'd find a complex tooth geometry the teeth are longer and thinner and have more faceted surfaces than Western-style teeth. This is particularly true of the crosscut teeth. Unless you're willing to devote many hours to prac­ticing sharpening these complex grinds, I suggest sticking with saws that have replaceable blades.
CHECKING FOR DRIFT
You've just bought a new back saw or dovetail saw, and after making a couple of test cuts, you notice they aren't straight. Is it you or the saw? Quite often it's the saw. In many cases the set of the teeth is too aggressive or not even. When this occurs, the saw tends to drift one way or the other. To eliminate this, use the procedure below.
Cut a kerf
japanese saws, cut a kerf
Start by making a test cut in a scrap of wood. Hold the saw lightly, and don't try to compensate if it starts to drift off course. Let it make its own kerf.
Check for drift
japanese saws, check for drift
Next, remove the saw from the kerf and check the kerf with a square. Any deviation means that the teeth on one side either are set more aggressively or are sharper than the other side. This is also a good time to check for the overall set. Insert the blade back in the kerf and try to wiggle it; if there's a lot of slop, the set is too aggressive.
Correct the problem
japanese saws, correct the problem
To reduce the set on one side of the saw, use an oilstone. Set the saw on a flat surface and add a drop or two of honing oil to the stone and rub it gently over the teeth. If the overall set is too aggressive, do this to both sides, taking the same number of strokes per side. Take just a few strokes with the oilstone and make another test cut. Repeat as necessary until the saw no longer drifts and the blade doesn't wobble in the kerf.

Bow Saws

bows saw
If you've never used a bow saw, give it a try. It's amazing how versatile one of these can be. A bow saw can be used to rip, crosscut, or cut curves. Although found less and less in today's shop, you can still find them in the occasional woodworking catalog. The beauty of a bow saw is that the blades are interchangeable. You can install a wide rip blade for ripping, a narrower blade for cross-cutting, or a fine blade for detail work.
Anatomy
bow saws, anatomy
A bow saw is a type of frame saw where the blade is held in an H-frame. Pins on the ends of the handles fit into holes in the ends of the blade. A stretcher connects to the cheeks of the frame via a loose mortise and tenon joint. Blade tension is provided by a twisted cord, cable, or threaded rod. The most common type of bow saw uses a toggle or twist stick to wind the cord to increase or decrease tension.
Basic use
bow saws, basic use
Select the desired blade and install it in the saw. Adjust the twist stick to tension the blade. The grip that you use with a bow saw is really a matter of personal preference. Some folks like to place their hands on opposite cheeks of the frame. A more traditional grip is to hold a handle with one hand and then overlap your other hand over it so it also grips the frame. Others feel comfortable with just one hand guiding the saw.

Coping And Fret Saws

coping and fret saws
Coping and fret saws are yet other types of frame saws where the blade is held in a tensioned frame that is adjustable. Most coping saws accept a 65/8"-long, very thin, narrow blade with fine teeth—typically 15 to 32 teeth per inch. Fret saws often have deeper throats or an adjustable frame, and accept blades with extremely fine teeth: as high a 96 teeth per inch. Both coping saws and fret saws are terrific for cutting curves, making pieced cuts, and getting into tight places. Coping saws have the added feature of a blade that can be pivoted to make it easier to follow a curve.
Anatomy
coping and fret saws, anatomy
Blade tension for coping and fret saws is supplied by the steel frame. The blades are usu­ally held in place with cross pins (although older coping saws may use blades with a hook or loop on the ends). These cross pins fit into grooves in metal spigots at the top of the frame and in the handle. The handle spigot threads into the handle and allows for fine adjustment of the tension.
Changing blades
coping and fret saws, changing blades
To change the blade on a coping saw or fret saw, start by loosening the handle a few turns. Then position the saw upside down on your bench and press down on the handle slightly to "close" the frame. This creates sufficient slack in the blade so that you can slip the pin at one end of the blade out of the corresponding spigot. To install a blade, reverse the procedure. Insert the blade in one spigot, depress the frame, and slip the other pin in its matching spigot. Apply additional tension by tightening the handle.
Basic use
coping and fret saws, basic use
In most cases, I install a blade so it cuts on the pull stroke. This does two things: It provides better control, and it keeps the blade in tension better than when pushing (photo and inset). Since these blades are so thin and fragile, they have a tendency to over­heat. There are a couple of ways to prevent this. First, use the full length of the blade as you cut. Second, stop periodically and allow the blade to cool.
Delicate cuts
coping and fret saws, delicated cuts
For delicate cuts, such as cutting veneer or other thin materials for inlay or marquetry, the fret saw is the tool to use. The extremely fine teeth let you negotiate curves without angling the blade. The secret to successful cutting is to fully support the thin material (see the sidebar below). Also, it's important to install the blade to cut down and on the pull stroke. This way the cutting action pulls the material against the bird's mouth (see the sidebar below) instead of away from it, which would cause the thin material to fracture.
BIRD'S MOUTH
crosscut saw, toolbox saws
The best way to support thin material when cutting with a fret saw is to use a V-notched board, called a bird's mouth, that clamps to your bench (drawing at right). The idea here is to posi­tion the work-piece and saw so that the cutting action takes place close to the point of the V for maximum support. For extremely accurate cuts, use the first few inches of blade nearest the handle, where the blade is the most rigid.

Gent's Saws

gents saw
A gent's saw is a special type of back saw designed for extremely fine work. A further refinement of this saw is known as an offset dovetail saw (inset). This type of saw features an offset handle and blade that can be reversed to make it easy to saw close to a surface, such as when trimming a through tenon. Since the handle is not in line with the blade, I don't recommend this type of saw for cutting joints.
Anatomy
gents saw, anatomy
For the most part a gent's saw should be reserved for use on small parts that require more delicacy than a back saw offers. They're great for fine detail work like cutting small rabbets, tenons, or dovetails. Because the blade is so thin and the kerf is so tight, the saw will cut straight as long as you start it straight. The only exception to this is a saw that's not set correctly (see Japanese Saws for more on this).
Basic use
gents saw, basic use
For the most part a gent's saw should be reserved for use on small parts that require more delicacy than a back saw offers. They're great for fine detail work like cutting small rabbets, tenons, or dovetails. Because the blade is so thin and the kerf is so tight, the saw will cut straight as long as you start it straight. The only exception to this is a saw that's not set correctly (see Japanese Saws for more on this).

Back Saws

back saws
The back saw (also known as a dovetail saw) can be one of the most important hands tools in the shop. If you hand-cut joinery, a quality back saw can make a big difference. Back saws are identifi­able by the brass or steel "back" that wraps around the top of the blade. This added rigidity allows for a thinner blade (typically around 0.030" thick), which creates a thin kerf and makes it easy to follow a pencil line or knife line.
Anatomy
back saws, anatomy
Backs saws come in a variety of lengths ranging from 8" to 14" and have fine teeth (14 to 22 teeth per inch) that may be sharpened as crosscut, rip, or combination teeth. If you're planning on doing a lot of hand-cut joinery it pays to get two back saws: one with crosscut teeth, the other with rip teeth. You'll find two predominant handle styles on back saws: open and closed. This really is a mat­ter of personal preference; some woodworkers prefer the extra rigidity a closed handle offers over an open handle.
Basic use
back saws, basic use
Because the blade is so thin and the kerf is so fine, a well-sharpened quality back saw will generally steer itself in a perfectly straight cut—all you have to do is start the cut straight. Use a light grip on the saw and let it do the work. If you're using a saw that's sharpened as a crosscut to rip (such as when cutting the cheeks of a tenon), you'll get better results if you stop often to clean out the kerf and the saw teeth.

Crosscut Saws

crosscut saw
A crosscut saw is designed to cut across the grain. Crosscut saws vary in length from 22" to 26" and generally have around 7 to 8 teeth per inch. Although you can find crosscut saws at most home centers and hardware stores, you may be better off picking up a used saw at an auction, estate sale, or garage sale. That's because the older saws were made with softer steel that allows for sharpening. Many of the modern saws use hardened teeth that are next to impossible to sharpen. Granted, they stay sharper longer; but when they do dull, you have to discard them. A quality older saw will last a lifetime with a little care and an occasional sharpening (see Sharpening Edge Tools for more on this).
Profile
crosscut saw, profile
The teeth of a crosscut saw act like tiny knives to cleanly sever the cross-grain wood fibers and to clear out the waste between the points. The teeth are usually sharpened at around a 14° angle and often have an aggressive set to prevent binding.
Bench hook anatomy
crosscut saw, bench hook anatomy
For accurate cross cutting (with any saw), I recommend using a bench hook. You can't find these in any catalog; you'll have to make your own. A bench hook is just a flat, wide piece of lumber with a pair of cleats fastened on the ends on opposite faces.
Using a bench hook
crosscut saw, using a bench hook
A bench hook is positioned on the workbench so the cleat on the bottom hooks onto the edge of the workbench. The work piece is butted up against the cleat on top, and slid over so the cut line aligns with the end of the cleat. This lets you use the cleat as a guide block to start the cut. The cleat also supports the wood fibers to help prevent splintering or tear out.
Sight guide
crosscut saw, sight guide
Even with a bench hook, you may want to use some type of sight aid to help keep the saw blade vertical. A try square or engi­neer's square works well for this when you set it near the saw blade. You can also use a known-square block of wood. Whichever you use, try to keep an even gap between the sight guide and the saw blade.
TOOLBOX SAWS
crosscut saw, toolbox saws
Toolbox saws are a modern invention that solves the age-old problem of trying to fit a full sized handsaw into a tool box (note the size difference between the toolbox saw and handsaw shown in the photo). These short saws (typically around 16" long) fit in larger tool boxes and have aggressive teeth. Because of the aggressive teeth, they have limited use in the shop. They're suitable only for rough cuts, such as when rough cutting boards to length.
STARTING A CUT
To make straight cuts with a saw, you have to start it straight. Sure, on saws with aggressively set teeth you'll be able to correct the cut some­what; but you're always better off starting the cut straight in the first place. Here are three effective ways to accomplish this:
Finger as a guide
starting a cut, finger as a guide
The classic way to start a saw cut is to use either a finger or your thumb as a guide. Start by marking a cut line on the board, then place the board on a saw horse or clamp it to the bench. Next, use your thumb to guide the saw blade to the waste side of the cut. Try to keep the saw and your hand, elbow, and shoulder all aligned. Draw the saw back a few inches and make a series of short cuts to create a kerf. Keep the blade constantly pressed against your thumb as a guide.
Guide block
starting a cut, guide block
For added accuracy you can start a cut with some type of guide block to hold the blade perpendicular to the work surface. A guide block not only keeps the edge square, but it also helps make a straight cut across the board. Often hand pressure alone will work to hold the block in place, but it's better to clamp it to the board for stability.
Starting notch
starting a cut, starting notch
Regardless of the type of saw you're using, the surest way to prevent it from hopping off the intended mark is to make a starting notch. Just draw the saw back a few times to make a notch.

Rip Saws

rip saw
A well tuned rip saw is a joy to use. It's a shame that it's getting increasingly difficult to find a good rip saw at your local hardware store or home center. Fortunately you can pick up a used rip saw at auctions, at estate sales, or on the Internet for just a couple of bucks. Rip saws are typically 26" in length and have around 5 teeth per inch . Older saws fea­ture a curved or "skew" back that was designed to reduce the weight at the toe, and reportedly improve the balance.
Teeth profile
rip saw, teeth profile
A rip saw has chisel like teeth that are designed to cut with the grain. In effect, they work like tiny planes or chisels to cleanly shear the wood fibers. The teeth are usually sharpened at around a 3° angle and are flat at the top of the teeth to create the planing or chiseling action. Because most quality rip saws are taper ground (see below), the set can be less aggressive.
Taper-ground
rip saw, tapper ground
A quality rip saw will be taper-ground; that is, the blade will gradually decrease in thickness as it moves away from the teeth. The area directly above the teeth is a constant thickness to provide solid support to the teeth. Tapering the blade greatly improves the clearance of the saw in the kerf, which reduces the likelihood of binding. This, of course, also makes it easier to drive the blade through the wood.
The main reason many folks have difficulty ripping a board with a handsaw is that they're using a crosscut saw. A well sharpened rip saw will slice through wood like a hot knife through butter. (For tips on starting a cut, see Starting A Cut in Crosscut Saw.)
Beginning stance
rip saw, beginning stance
With your hand, elbow, and shoulder all aligned with the saw blade, start your cut with the blade at a slight angle. This makes it easier to create a starting notch to guide the blade. Use your other hand to guide the blade at the start of the cut and to secure the work piece as you continue.
Shift to a more vertical cut
rip saw, shift to a more vertical cut
To let the saw teeth do their job as tiny chisels or planes, it's best to shift to a more vertical cut as you make your way into the board. Take long, even strokes and let the saw do the work. Concentrate on putting force into the down stroke, and lighten up on the upstroke. Try to keep a firm, relatively loose grip on the handle. As always, a well sharpened saw will cut with little effort (see Sharpening Edge Tools for details on sharpening a saw).
Chatter
Rip saw, chatter
Anyone who has ever used a handsaw has probably experienced chatter when the blade vibrates with a noisy chatter on the backstroke. This is a sure sign of an alignment problem: You're most likely standing to one side or the other of the cut. The remedy is to keep saw, hand, elbow, and shoulder in the same plane.

Saw Terminology

saw terminology
Before delving into the wide variety of saws available and their uses, it's important first to understand the terms used to describe saws, their teeth, and the cutting action.
Anatomy of a handsaw
Every saw has at least two parts: the blade and a handle. Each blade gener­ally has a toe (the end farthest from the handle) and a heel (the end closest to the handle). Handles may be open or closed (see Comparative Lengths), intricate or simple, and be made of wood, metal, plastic, or a combination of these.
Saw teeth
saw teeth
For the most part, the configuration of the saw teeth will define whether the saw is designed to cut with the grain or against the grain. Teeth designed to cut with the grain are rip teeth, and are sharpened flat on the top to create a planing or chiseling action. Crosscut teeth, on the other hand, are sharpened with fine points on the ends to act as small knives to cleanly sever the cross-grain wood fibers. Some saws are sharpened as sort of a hybrid, intended to be used for both cross-cutting and ripping. These saws do a reasonable job, but not nearly as good as the individual saws.
Teeth per inch
saw, teeth per inch
In addition to how a saw blade is sharpened, the number of teeth per inch will have a great impact on the performance of the saw. Generally, the greater the number of teeth, the finer the cut, and the longer it'll take to make the cut. There are two common systems used to describe this: teeth per inch and points per inch. Points per inch includes the teeth at each point, whereas teeth per inch doesn't a blade with 8 points per inch will have 7 teeth per inch.
Kerf versus set
saw, kerf versus set
Another important characteristic of a saw blade is its set. Set is the amount each tooth is bent out from the saw blade. Without set, the blade would quickly bind in the kerf. Coarse cutting saws (such as the rip saw) generally have a wider set than a finer cut­ting saw. This allows for plenty of clearance between the blade and the wall of the kerf Aggressively set teeth are also commonly used on saws intended to cut green or wet wood. Here again, the wider set provides much needed chip clearance.
Tapered blades
saw, tapered blades
Another common method used to prevent binding when cutting with a handsaw is to taper the blade. Looking at a cross section of a tapered blade, you can see that the blade is a uniform thickness just above the teeth and then quickly begins to taper up toward the back. Most modern handsaws that you find in a hardware store or home center are not taper ground you generally have to pick up an older saw to find this useful feature. Most handsaws have one of two handle styles: open or closed grip. Another common handle style is the turned or round handle common to coping, fret, and gent's saws. The type of grip you choose is a matter of personal taste. Whichever style you choose, go with a wood handle, as it's easy to shape and mold to fit your hand. It's surprising how many wood­workers are reluctant to modify a handle to better fit their hand. I always consider any "one size fits all" handle as a suggested starting point for shap­ing it to better fit my hand. Give it try: You'll be surprised what a big differ­ence a custom-fit handle will make.
Open grip
saw, open grip
An open grip (or pistol grip) can be found on some back and dovetail saws like the one shown in the top photo. I personally find this style of handle very comfortable, because it doesn't crunch my fingers like some closed grips do. If you've got large hands, you may find this grip more comfortable.
Closed grip
saw, closed grip
Closed grips are more common than open grips. They're generally more rugged and less easily damaged. A closed grip saw also affords a slightly more rigid grip, especially if you frequently twist a saw to correct for a crooked cut.
COMPARATIVE LENGTHS
saw, comparative lengths
Rip saws are generally the longest of handsaws, with crosscut saws the next longest. Shorter versions of crosscut saws (commonly referred to as panel saws) range between 20" and 22". Back saws average around 12" to 14" in length.
PROTECTING TEETH
For a saw to really function well. the teeth need to be sharp and stay sharp. Without some form of protec­tion, the teeth can quickly dull if a saw is tossed into a toolbox or dropped into a tool well. Here are three simple ways to protect the teeth of your saws.
Garden hose
saw, garden hose
For large saws (like a crosscut or rip saw), the easiest way to protect the teeth is to cover them with a short length of garden hose. You can buy this by the foot at most home centers. Make a slit the full length of the hose with a utility knife, and slip it over the teeth. You may need to temporarily attach the hose to the saw blade with duct tape until the hose straightens out.
Plastic tubing
saw, plastic tubing
The teeth on smaller saws are best protected with smaller diameter plastic tubing. Most home centers sell it by the foot. Just slit the tubing along its length and slip it over the teeth.
Report binders
saw, report binders
For even smaller saws, such as a back or dovetail saw, the plastic spine from a report binder does a good job of protecting the teeth. These can be found at any office supply store and slip easily over the teeth.
Back To Top